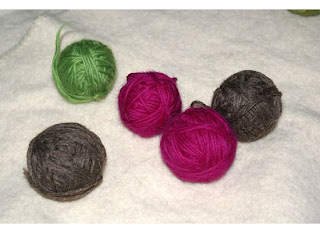
When I first started researching natural living, and specifically cloth diapering (for my future baby...) I came across a lot of information about laundering: what soaps work best, how to dry, how to "fluff" etc. Boy, it was much more in depth than I could have imagined at first, but now I'm sort of acclimated. Anyway, one of the things that was talked about rather often was dryer balls, wool versus those plastic nubby ones. Now... I was trying to really go more natural, plus in my "old" age, I seem to be developing allergies and sensitivities to EVERYTHING. So in taking out the fabric softener and dryer sheets, I didn't want to add other chemicals the plastic bits might be letting off, into my clothes and the air. Plus, I could MAKE wool ones with left over bits... This is how I make mine, which I'm sure is similar to someone somewhere out there, so if someone else does it the same way, I'm sorry.
Let's begin!
 |
| stash... and a cat ear.... |
First... Gather your stash, you will need felt-able wool yarn (not super wash) and I like to use a "core" of acrylic or cotton sometimes to save on wool, but a wool core works too, but you may want some acrylic or cotton. You'll also need a leg of pantyhose or a thigh high stocking for felting, unless you have those nifty felting balls. Oh, and a washing machine, and i like to use baby shampoo for felting. I used it once and it worked so well, I didn't go back to other detergents.
Now, make the balls! Start with whatever material you decided on for the core, and start wrapping like you would any ball of yarn! (well, maybe a little more loosely) When you get to a bit over half the size ball you want, stop and tie the yarn around a few times so it's secure.
 Next, take your wool (I chose some fun colors, because I'm craving brights!) and continue to wrap the ball until it's well covered, making sure not to wrap too tightly, you want it to be able to shrink down. I like to then continue to wrap the strand randomly around the ball, unlike the normal process where you would have several passes over the same area, to create a more net like covering. Tie a few knots around this to make sure it's very secure!
Repeat this process to make as many as you like, I made six this go-around, because I like to use two or so in the dryer at once and in my house... they tend to disappear and become dog toys.
After you have all the balls wrapped, one at a time, put them into the panty hose, tying it off after each on. When you are done it will look like you have a string of beads.

Now it's time to felt!!! I toss them in the washing machine on a hot wash, cold rinse and put a dab of baby shampoo right on them (not in the detergent slot). This time around I put them in with a hat I was felting and I think they really helped! I also put mine through the dryer on "high heat" but this may or may not be necessary.
Remove from the panty hose and viola! Dryer balls!
This one felted pretty well, I think. It should stay put.
Now... just a quick note on using them...
You just toss them in with your regular laundry in the dryer. They WILL become a bit pilly over time, but you can remove the fuzz, and/ or wrap another layer of wool over and re-felt. If you like yummy smells, you can dab them with some essential oils and that will release fragrance into the clothes, not as strong as a fabric sheet, but it does work.
Also... make sure your regular yarn balls stay far away... My hubby mistook a ball of yarn for a dryer ball one day and chucked it it... needless to say... it didn't work so well, we ended up with a tangled mess! Also... the dogs (and cats) really like these, so make sure they stay out of reach and don't roll away on you, you won't get them back!
Enjoy!


No comments:
Post a Comment